Almost everyone now has a smartphone. The two dominant platforms are: Google Android and Apple iOS. Both these platforms have virtual assistant built into the OS. Android’s virtual assistant is called Google Assistant, and Apple’s virtual assistant is called Siri. In this post, I will show you how you can build a custom action for Google Assistant. The equivalent for custom action in Bot Framework is Skills.
Here is the high level architecture diagram of the solution.

The starting point to build the virtual assistant solution is create a new Actions project. You need to head over to https://console.actions.google.com/ to create a new Actions project.
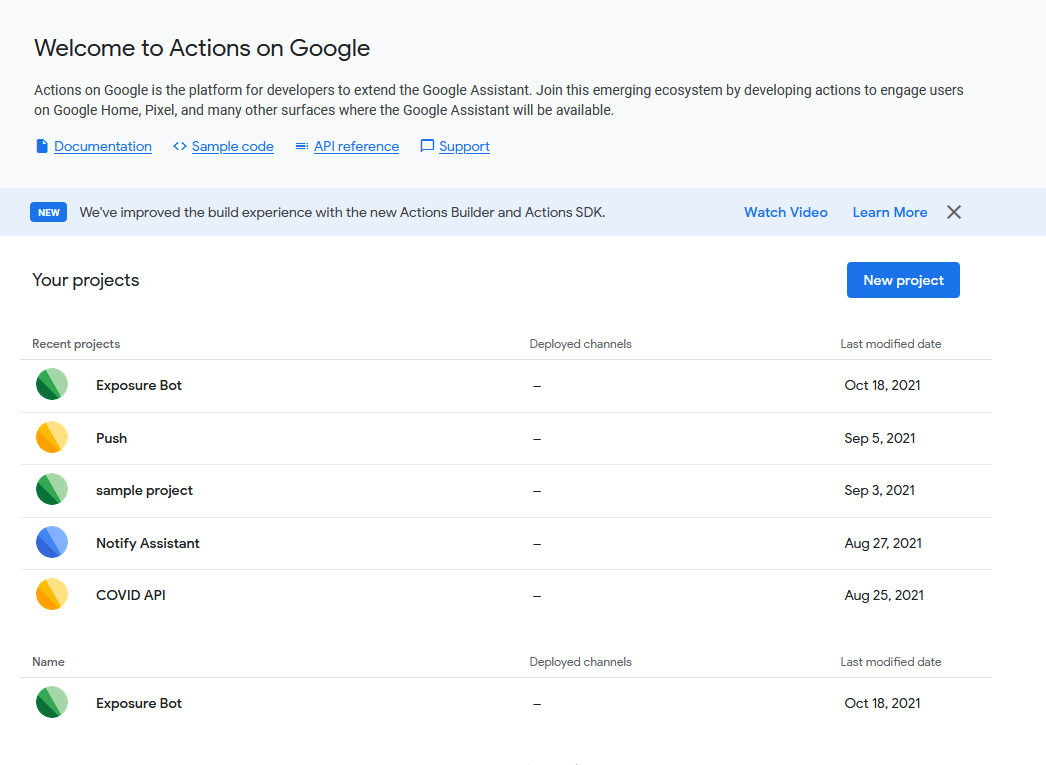
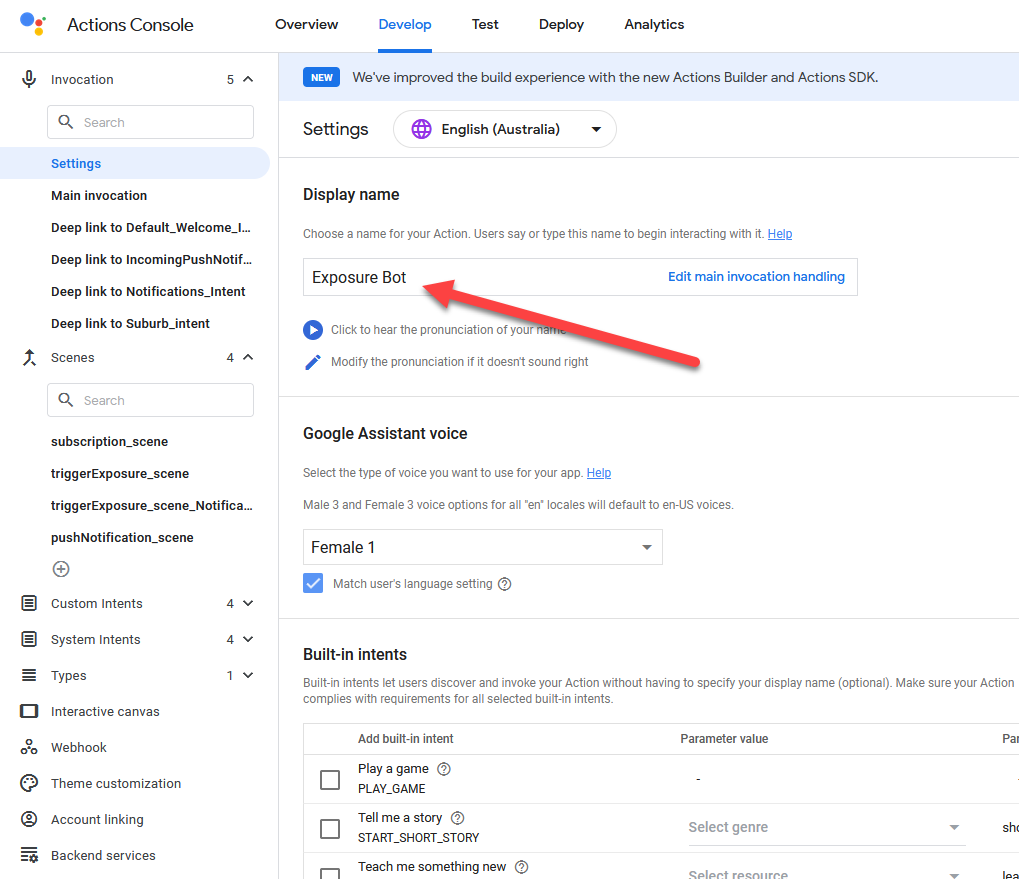
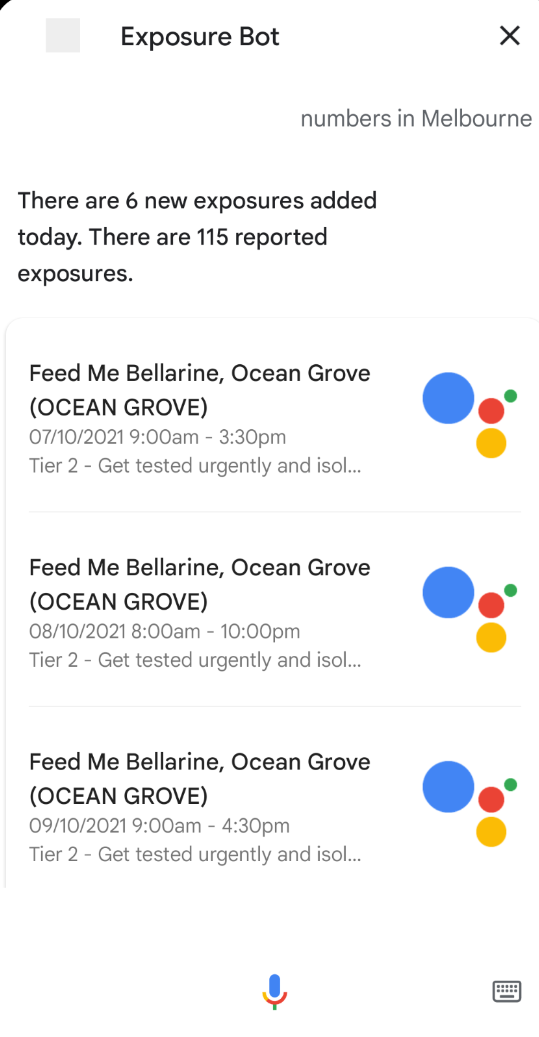
The first thing you need to do is name your bot. I have named mine as “Exposure Bot”. This means that the user can trigger the bot by saying “Talk to exposure bot” to the Google Assistant.
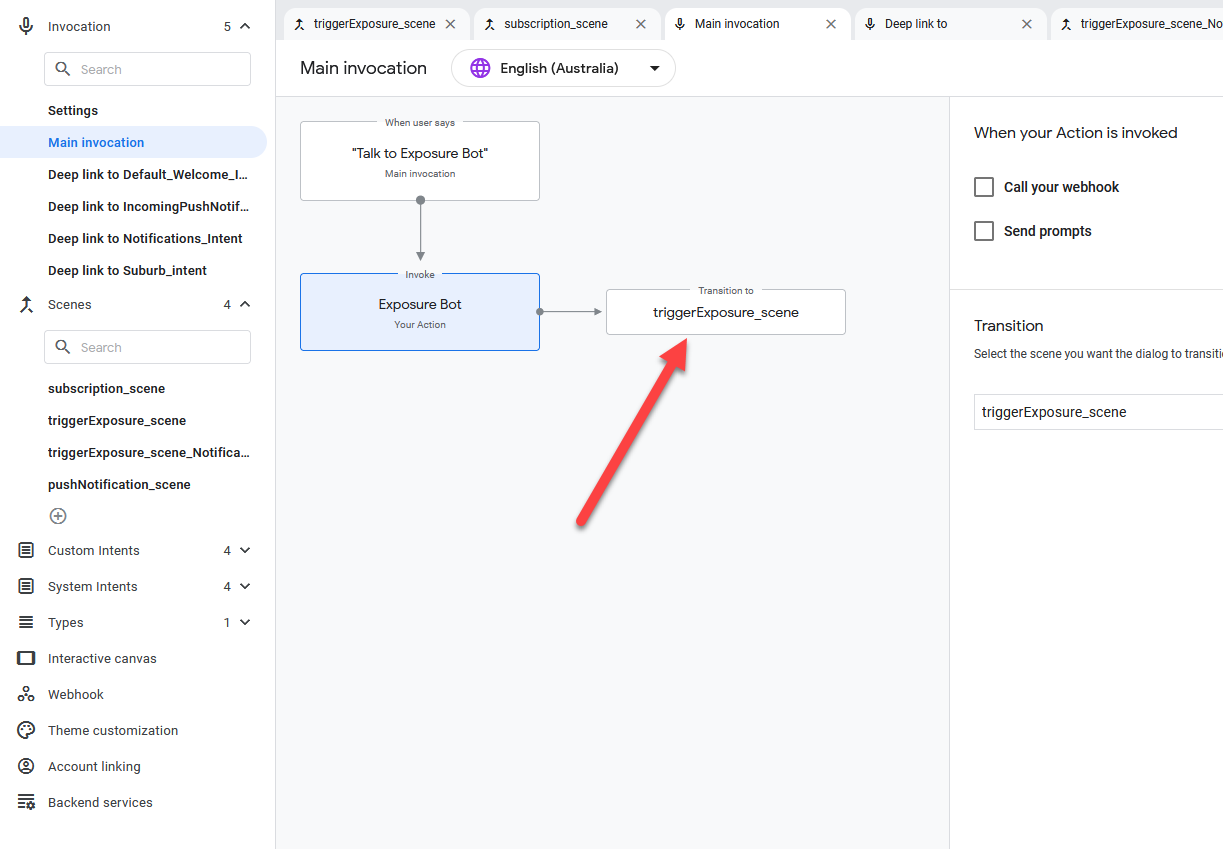
We then need to create one or more scenes to handle the user’s input. After the user has triggered the bot using the phrase “Talk to exposure bot”, she is then transferred to a scene called triggerExposure_scene.
We can now design the main scene that handles multiple inputs. This scene is called triggerExposure_scene.

In this scene you can 3 intents to decide what to do based on user input. We have three intents on the Actions project.
- Suburb_intent – When the user says something like “Show me the numbers for Melbourne”, it will be mapped to this intent. A Flow (webhook) will be called to get the response for this intent
- Notifications_intent – When the user says something like “Send me daily notifications”, it will be mapped to this intent. The user is transitioned over to a scene called subscription_scene so that we can get accurate GPS information for the subscription and user’s permission for sending push notifications
- IncomingPushNotifications_Intent – There is a scheduled Flow that sends exposure notifications three times a day to the user. When the user clicks on that notification, this intent is invoked. But, as you can see when that happens, the conversation immediately ends. The user should never hit this intent in this scene.
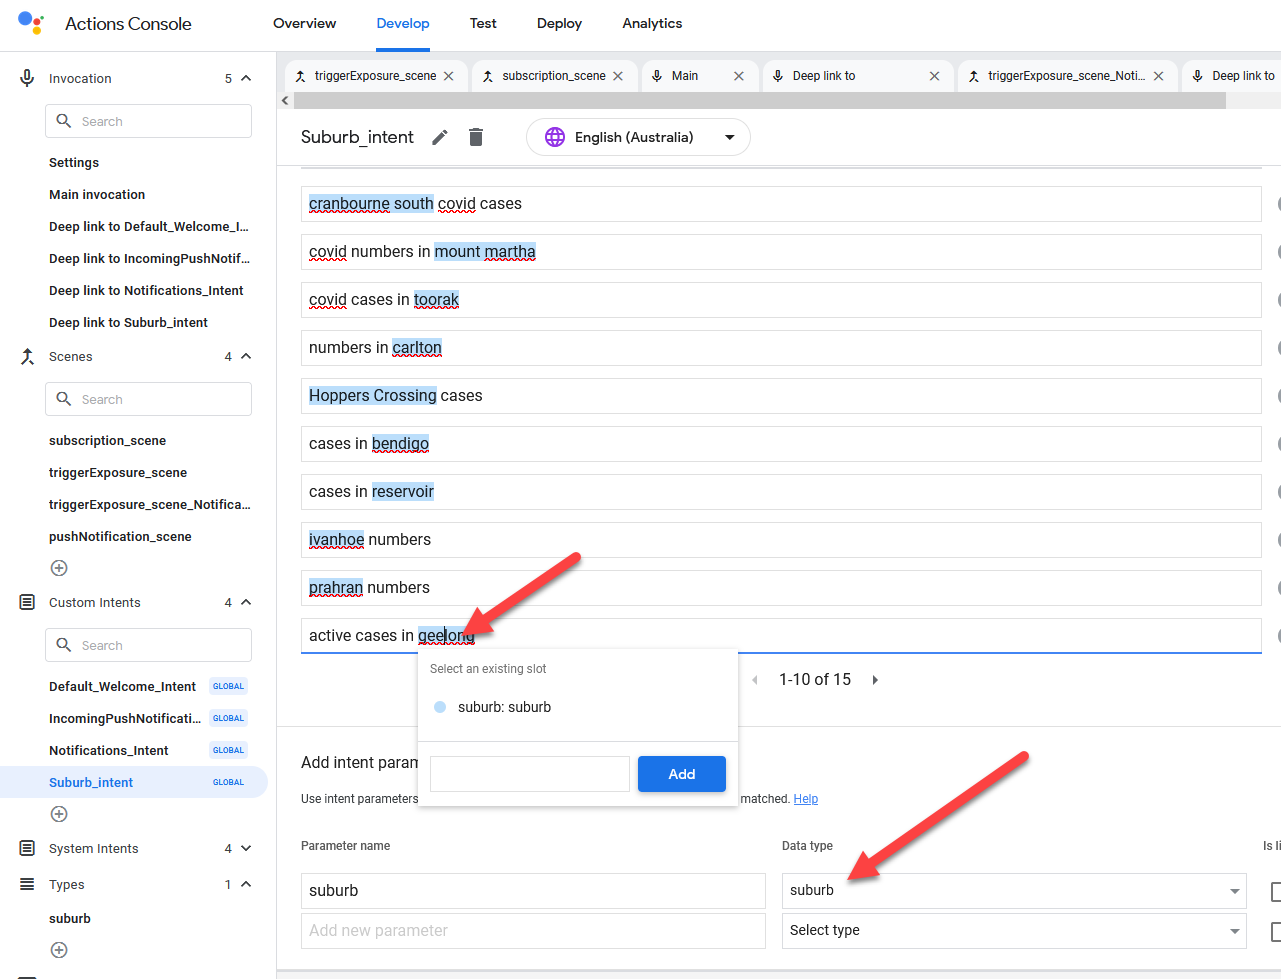
Now let us look at intents next. Intent is basically figuring out what the user intends to do, based on training phrases. For example, below are the training phrases for Suburb_intent. Notice that you can map the types (Entity in PVA) right inside the training phrase itself.
For figuring out whether the user wants to receive push notifications we have different set of training phrases.

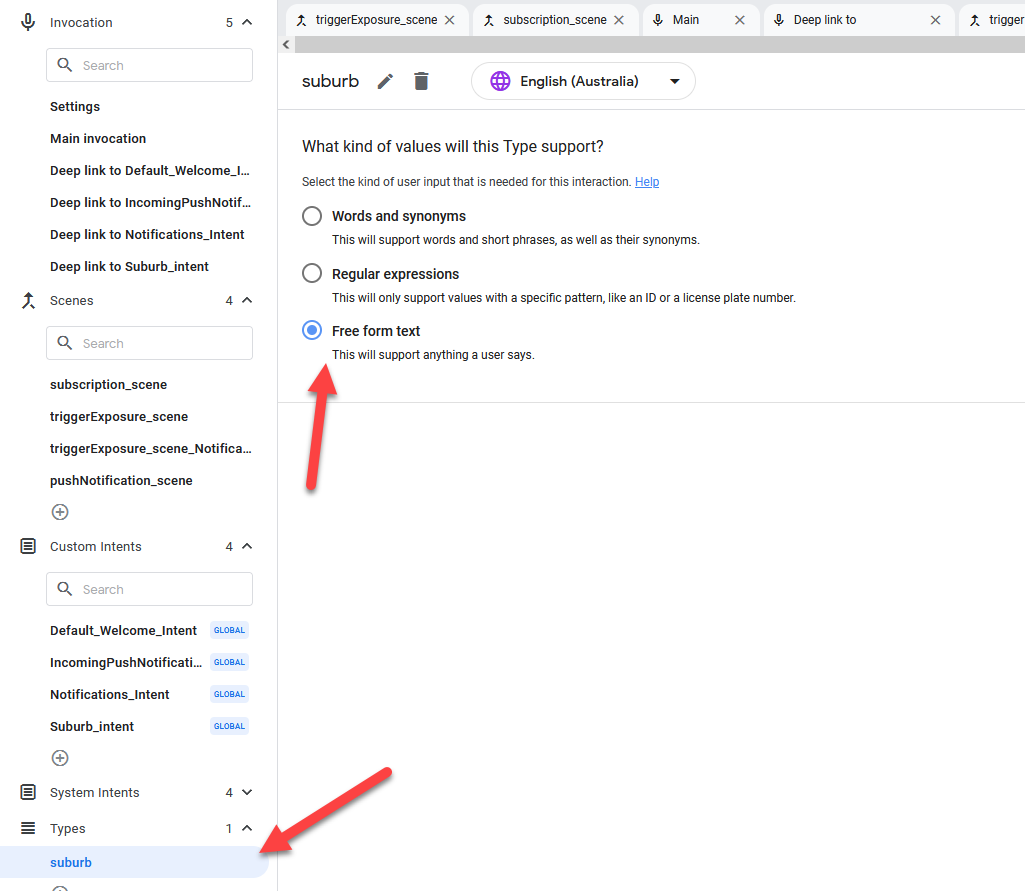
The suburb type itself is just free text.
All the above scenes and intents are used when the user is chatting with the bot. But, in the case of push notifications the IncomingPushNotifications_Intent will be invoked only when the user clicks on the notification in Android. Here is how that scene looks. Notice that it is global intent, which means it can be invoked even in the middle of the conversation.

When the user clicks on the push notification, she is transferred to the pushNotification_scene, which grabs the current location using Android’s native location API and calls Flow to get the current exposure data.
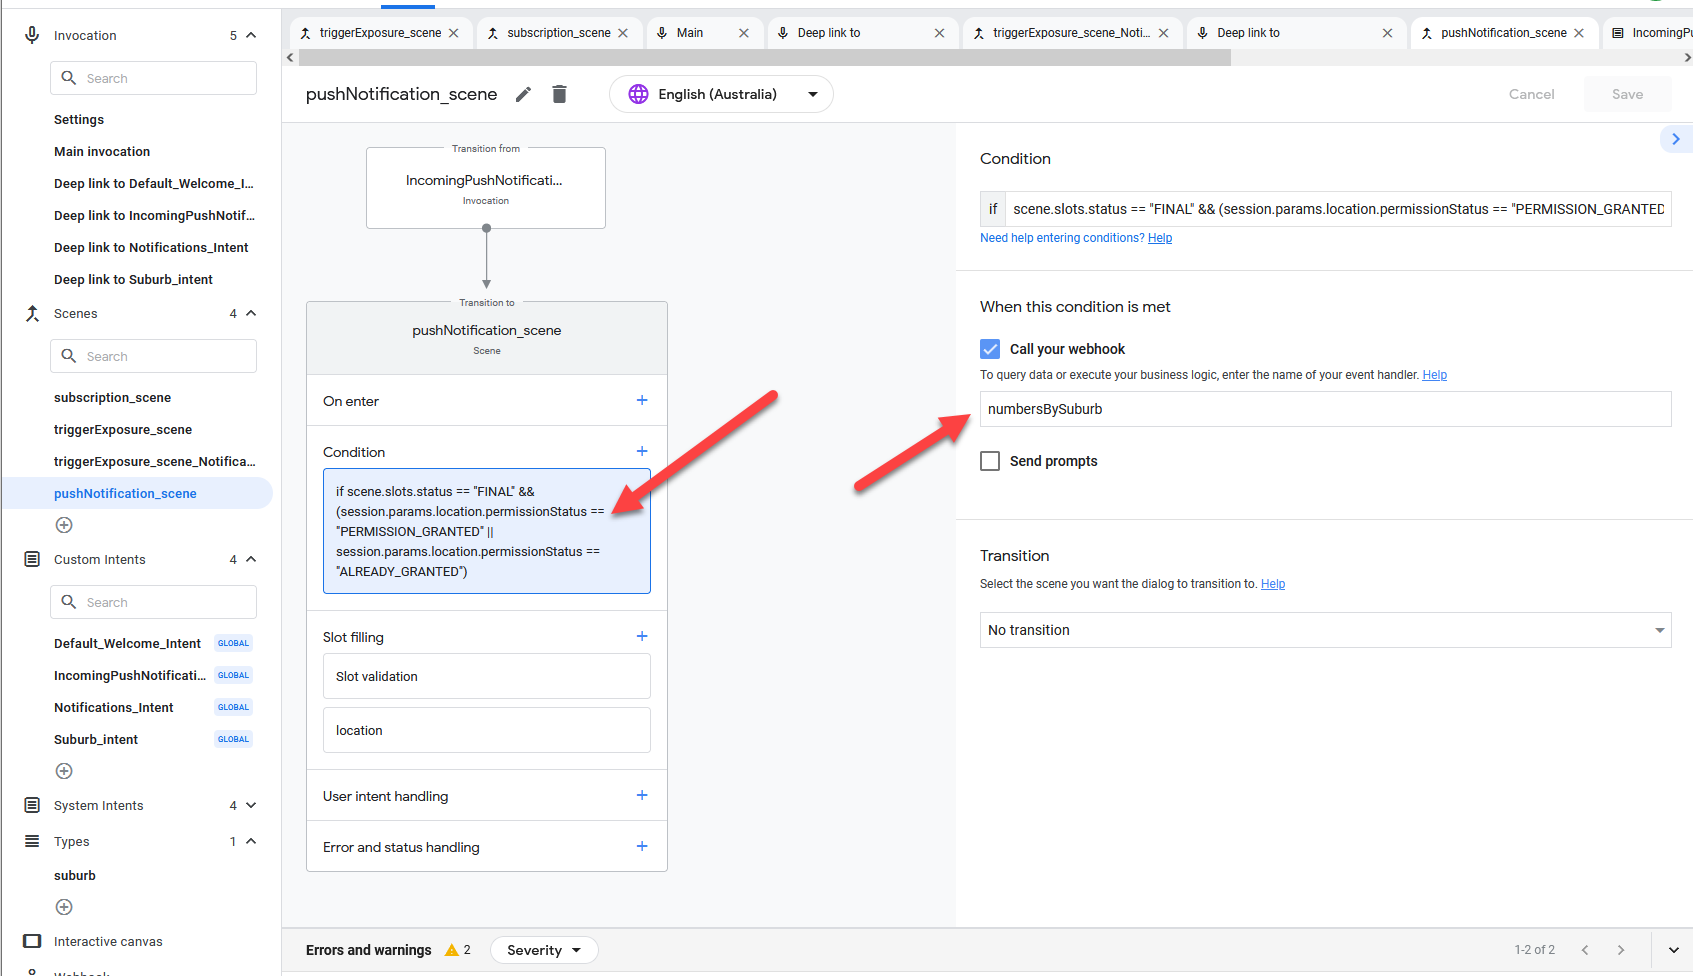
This is how suburb_intent also gets the current exposure data.

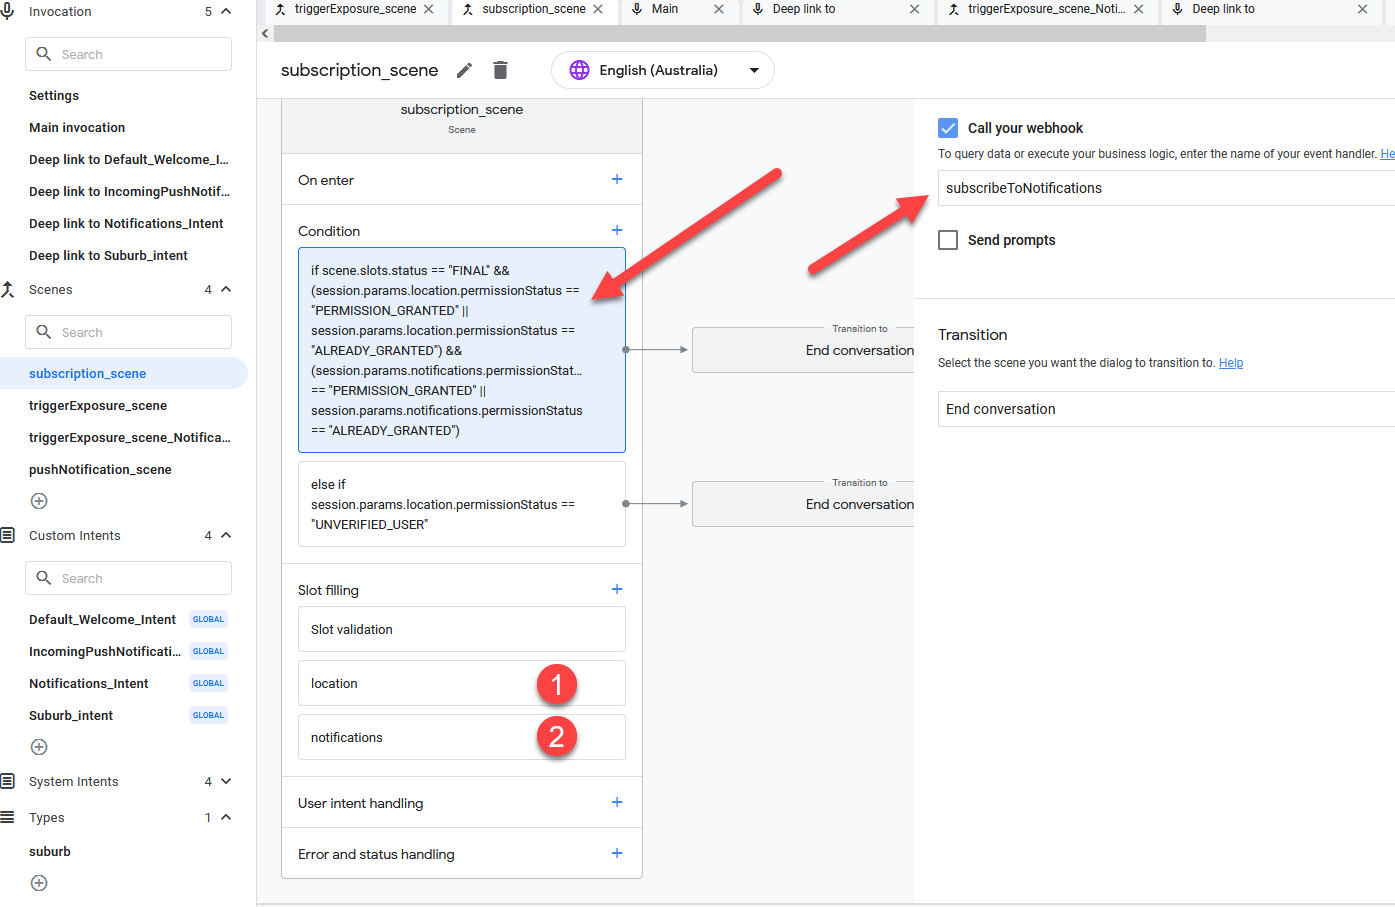
We have similar webhook call for setting up the push notification subscription. Notice how we are grabbing the location and notification permission and then calling the Flow will the message name,
We are calling webhooks in couple of places. But, where are we defining the Flow that is called? It is in the webhook area. The key to call the Flow is on the URL itself. I am not aware of any alternate method to transparently use OAuth in Google Actions. If you know a better way to handle authentication in this context, please add your comment on the post.

There are two more things you need to make sure:
- Action API is enable for the project. Navigate to https://console.cloud.google.com/apis/api/actions.googleapis.com/overview
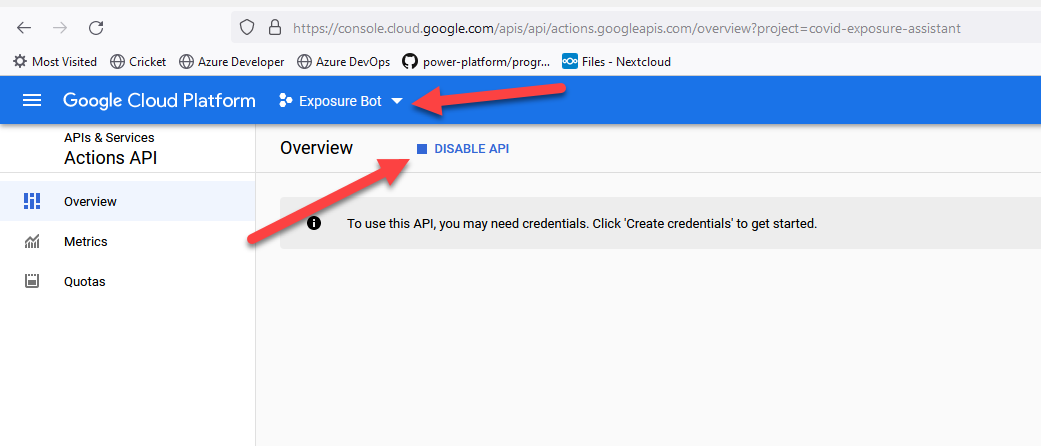
- Service Account is created for the project
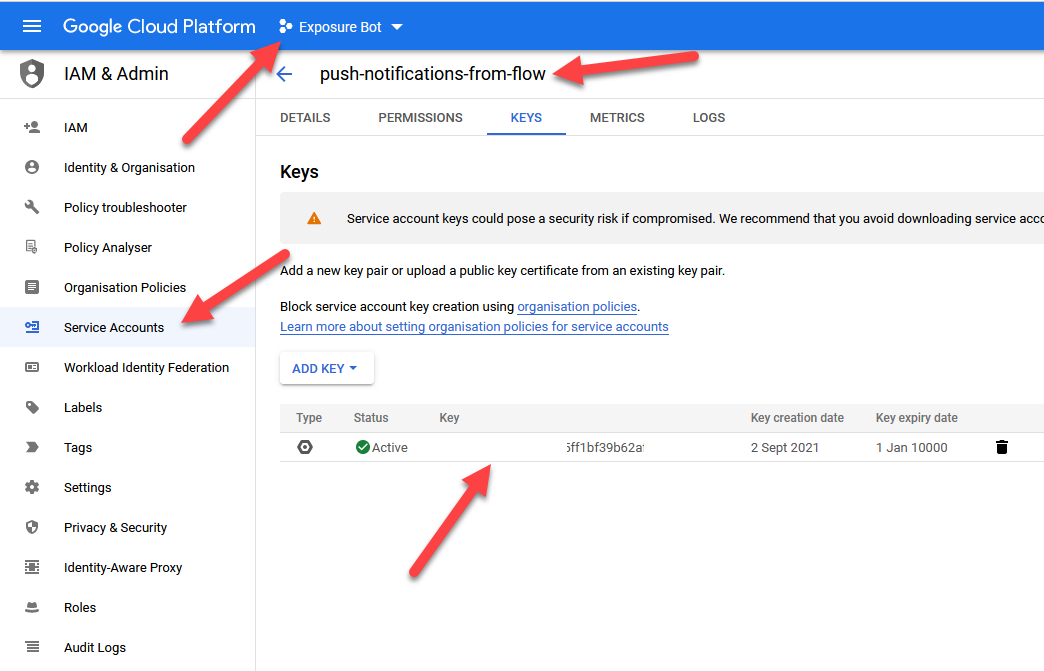
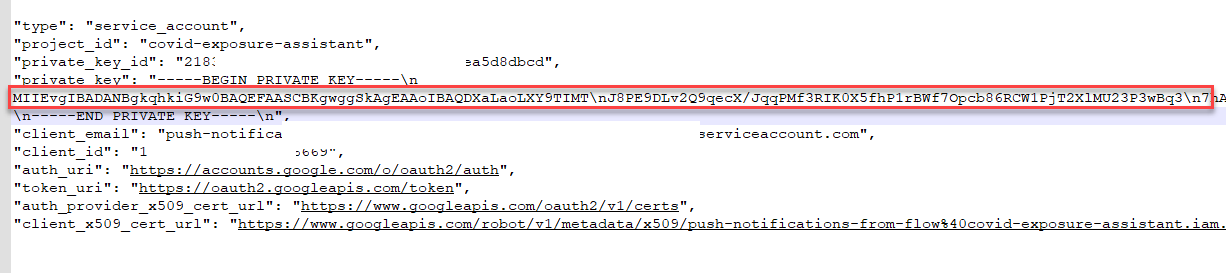
Both enabling Actions API and creating service account for the project are documented in https://codelabs.developers.google.com/codelabs/actions-user-engagement/#3, which you can refer for additional instructions. After you download the JSON from service account copy only the key and keep it aside. We would need it for adding to key vault. Don’t include the —BEGIN PRIVATE KEY and –END PRIVATE KEY parts. Copy just the key as highlighted.
The next part is setting up the Azure resources: Function App, Storage Account, App Insights and Key Vault. Head over to https://github.com/rajyraman/Google-Actions-Push-Notifications where you have a deploy to Azure button. Click the button and fill in the Google Account Email, Google Secret and you Azure User Id.
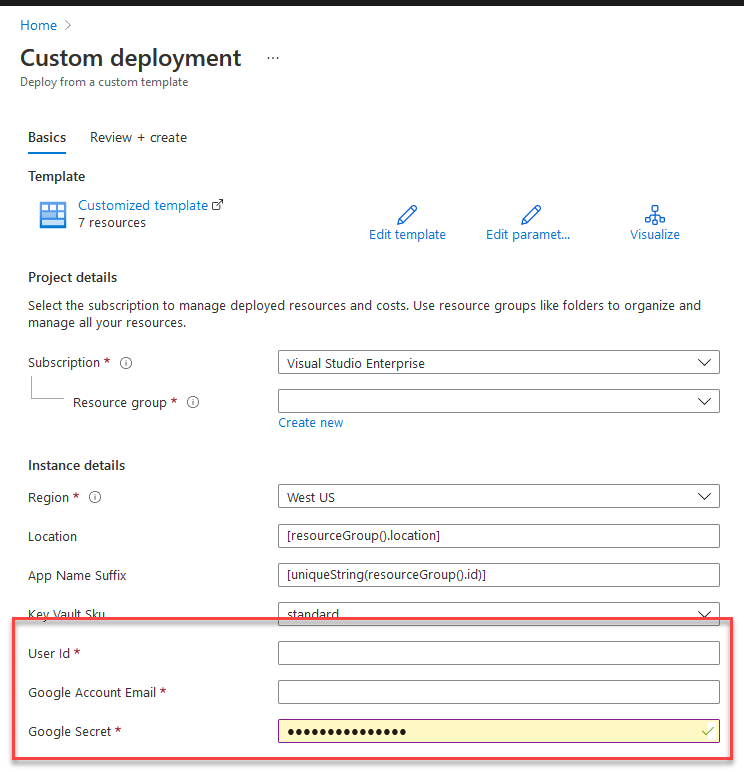
You can click on the visualise button to see what resources will be deployed.

Both Google Account Email and Google Secret are in the Service Account JSON file which you would have downloaded. In order to get the User Id run the following command in AZ CLI.
az ad signed-in-user show --query objectId --output tsv
After the resources are provisioned, you need to deploy the Function code to the Azure, by running this command.
func azure functionapp publish FUNCTIONAPPNAME
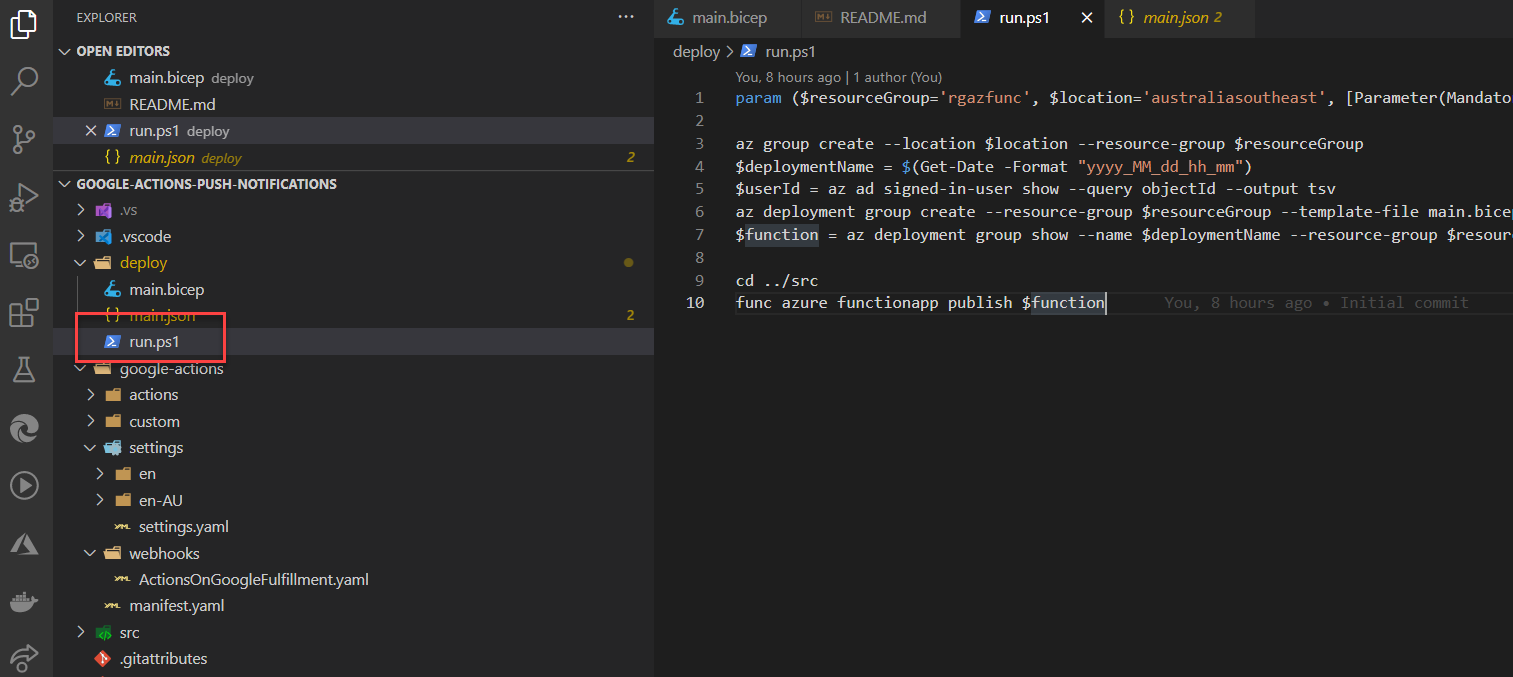
If you want to deploy from command line and have Bicep and Az CLI installed, I have also included a PowerShell script that you can use to deploy from your local machine.
Since the Function App has OpenAPI enabled, you can also access it from the browser to quickly understand the Function App.
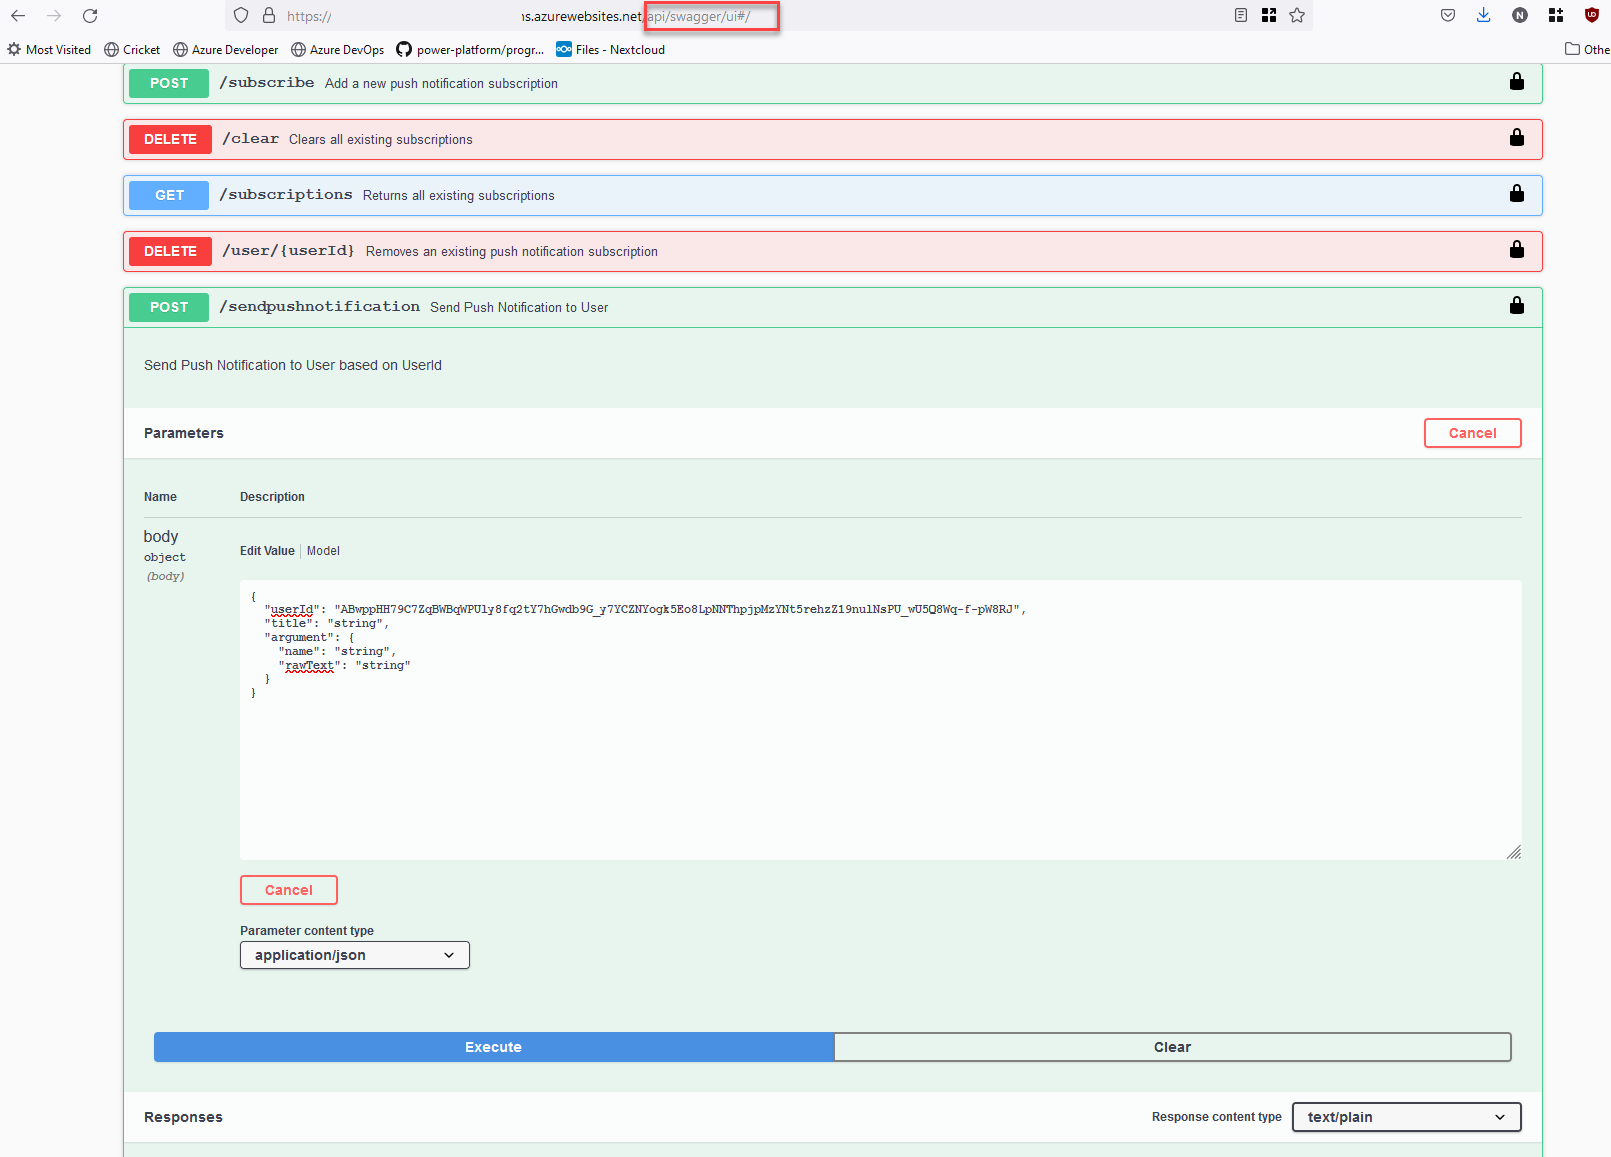
On production it is not a good idea to exposure this to everyone, as the documentation might have confidential data, so you can lock the Swagger UI down further or remove it altogether. Refer https://github.com/Azure/azure-functions-openapi-extension/blob/main/docs/openapi.md#configuration for additional information.
The Function App uses Durable Entity that is persisted in Azure Storage. Since we just need to store the Google User Id and Location for which exposure notification is required, it is a good fit for small applications like this one.
I have also uploaded all the Google Actions code to the repo, so in order to deploy this to Google Action, you can use the gactions CLI.

The command to run is
gactions login
gactions push
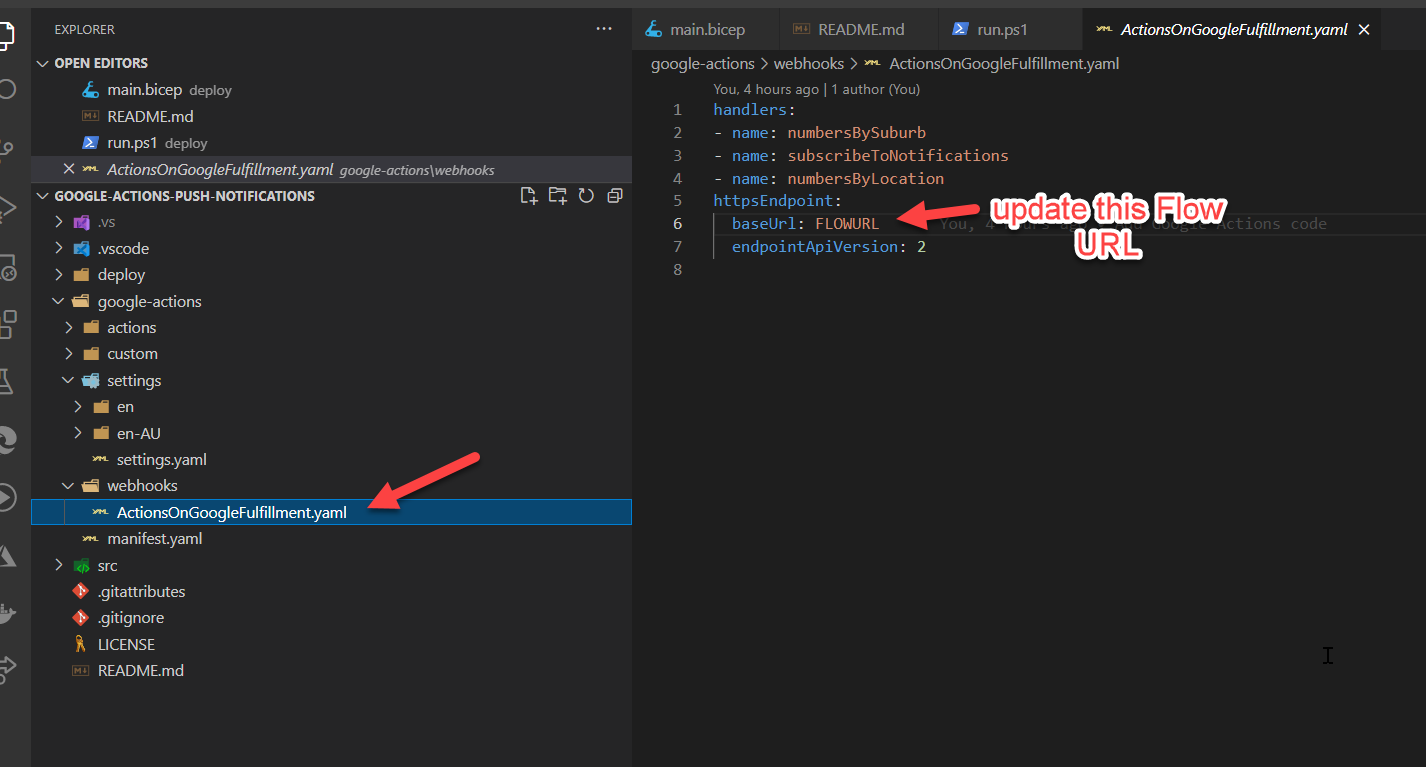
Before deploying you need to update the Flow URL to the URL of Get Exposure Data Flow. This Flow gets the COVID 19 Exposure Data provided by Data.VIC Victorian Exposure Sites API.
You can download the Managed Solution with Custom Connectors and Flows from https://1drv.ms/u/s!AvzjERKFC6gOyAZf2Mw1f2QkgYft?e=HL1bnV. Here is how the solution looks.
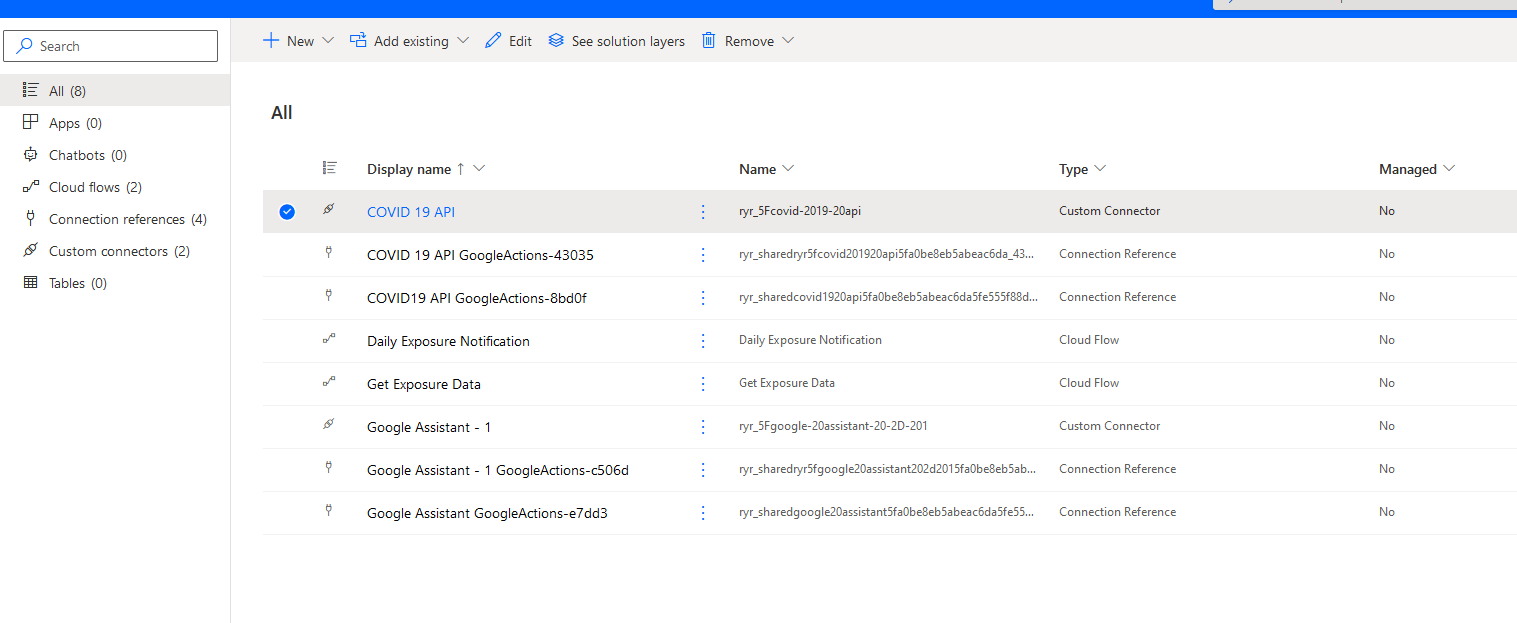
After importing you also have to change the base URL of the Google Assistant custom connector to point to the correct base URL of your Function App. This is the Function App that manages subscription for locations, Google API authentication and sending push notification to the user.

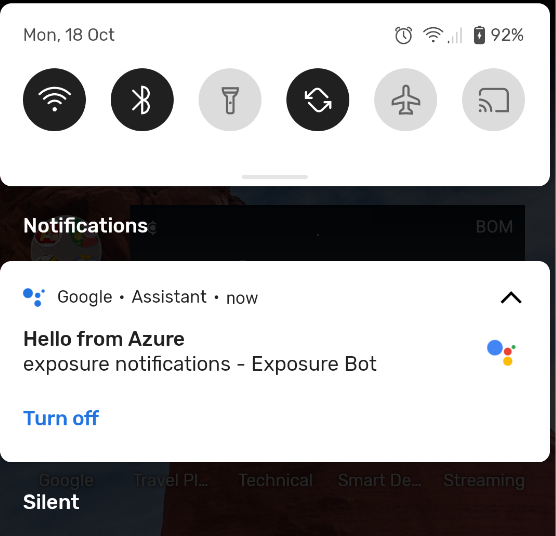
After all of this is setup you would be able to chat with the bot from your Google Assistant.
All Actions messages are captures in logs, so you can always refer them if you are stuck.

You can refer the source code on https://github.com/rajyraman/Google-Actions-Push-Notifications
Credit: flaticon.com for the icons used in custom connector
References:
